
Flashback Effect
Commonly used in films is a sepia effect which is added to the footage in order to create either an ‘aged’ look or is used to highlight a flashback. In order to help my audience clearly understand which scenes are being dreamt about in the nightmare, I have added a sepia effect to them. This includes all 6 scenes with the exception of the in-dispersed shots of the protagonist writhing in bed as those shots represent the real time.
A Different tone
Whilst the word ‘sepia’ has immediate denotations of a golden/faded look, often it is not used in isolation. Most sepia effects used in films will be adjusted to give a more naturalised tone to suit the mood of the footage. Some producers will choose to have a ‘hard sepia’ tone which is portrayed in the image below:
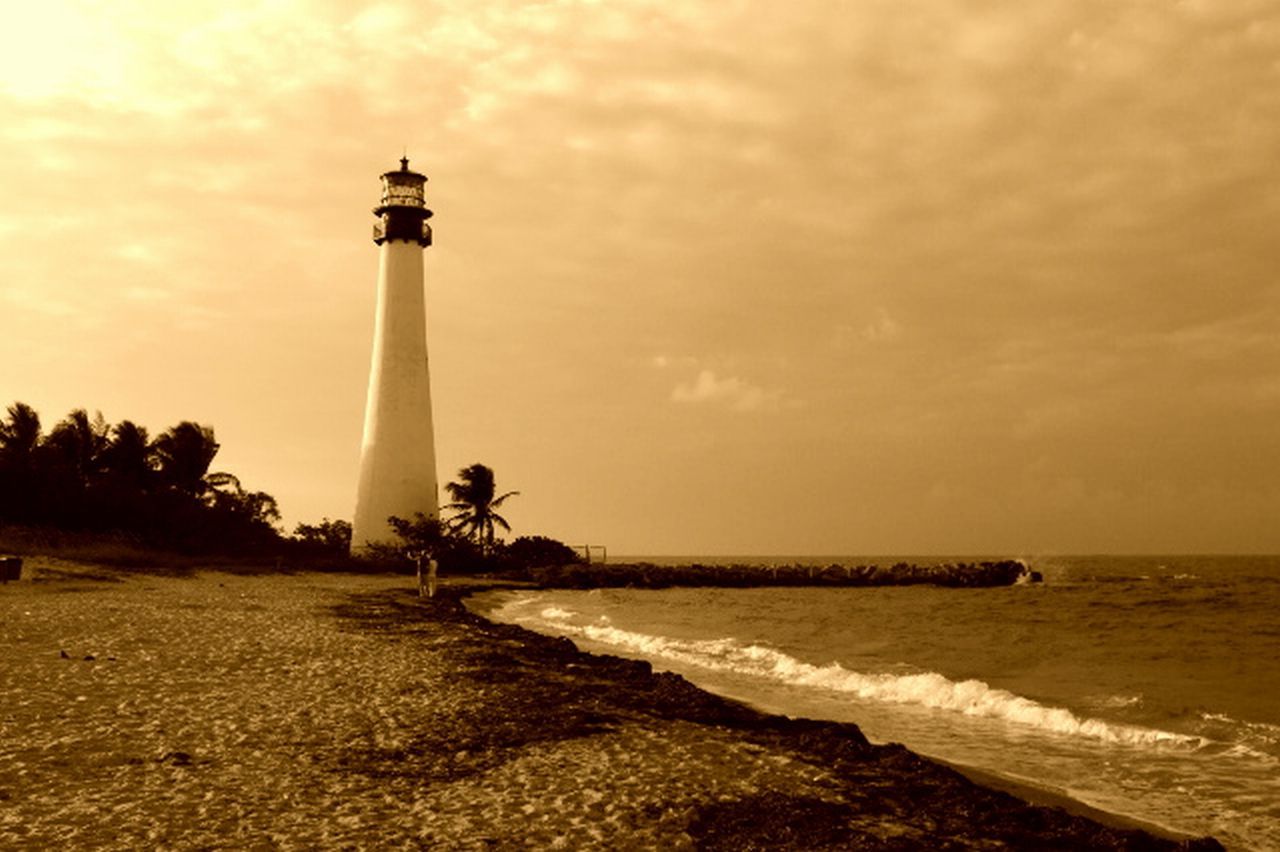 Ask anyone what effect has been overlaid on this image and it is likely they will say ‘a sepia effect’ which helps to give the image a nostalgic feel.
The below image represents a ‘light sepia’ effect:

Ask anyone what effect has been overlaid here and it is unlikely they will come out with a clear cut answer of a ‘sepia’ effect. Perhaps the intention of using a mix of tones in this image is for an artistic effect and it looks more natural than the first image.
Creating my own effect
My footage is not supposed to be nostalgic or artistic, so I wanted to aim for an effect in the middle of the two examples above.
To create my intended effect, I experimented with the ‘CC Toner’ effect which has sub divisions of highlights, midtones and shadows.
The Highlights:
I used a pale blue colour to give the footage more light than it would usually have.
The Midtones:
This was the main body of the colour so in order to create the sepia effect, I chose a pale brown and adjusted the levels until I was satisfied.
The Shadows:
The importance of shadowing should not be underestimated. The colour black is used to cast a mask over the edges of the footage, giving it a more realistic and natural effect.
The outcome
I made sure that the CC Tone values for each scene was the same in order to maintain consistency. Below is an example of the sepia effect I created:


Hi Kasia,
The Sepia Light House Image that you are using can you please tell me if you have its rights? I am looking for this image and really like to have it in High Definition. If you can help me find the source it would be very helpful.
Thank You
Hi Ali,
I do not have the rights to the Light House image – I was using it purely to demonstrate the sepia effect. Copy this link into the URL: https://www.google.co.uk/search?q=lighthouse+sepia+effect&source=lnms&tbm=isch&sa=X&ei=q28EU8ifIo7A7AaUzIHgBQ&ved=0CAcQ_AUoAQ&biw=1348&bih=607#facrc=_&imgdii=_&imgrc=Sit1XYCkuNUGBM%253A%3BjmOthRLprfad-M%3Bhttp%253A%252F%252Fcaramelchailatte.files.wordpress.com%252F2011%252F07%252Fsepia-light-house-beach2.jpg%3Bhttp%253A%252F%252Fcaramelchailatte.wordpress.com%252F%3B1280%3B852
When you click on ‘visit page’ of the image, it brings you to someone’s blog, so I’m not sure if they own the image or are just using it as a visual aid like I did. That’s the only source I can trace.
Hope that helps